Wondering how to install Vivoil flow dividers? Here is an installation guide to help you perform all the important steps.
In the next few paragraphs, you will find the steps you need to follow to install your Vivoil flow divider, whether it is a valveless, multivalve, or single-valve component.
You will see that the preliminary operations and start-up will be identical for all types of dividers. In the case of dividers with valves, you will only have to perform one more operation: their calibration.
Before installation
Before installing the divider, it is important to check that the pipes are clean and of the right size and that the fluid chosen is appropriate.
Component cleaning
First, we advise you to check that the inlet and connecting pipe sections to the actuators are clean. In fact, dust, metal burrs, and rubber fragments left behind by fittings can affect the operation of the flow divider.
Checking the pipes
We suggest that the pipes be as much of the same length as possible, or at least as similar as possible. This is important to minimize load differences generated by the different branches that could affect the division accuracy.
Fluid control
Before proceeding with installation, it is a good idea to check that the system fluid is clean, suitable for the flow divider, and has the same viscosity as recommended in the catalogue. In fact, using a fluid other than the one suggested would cause malfunctions in the component and shorten the life of the divider.
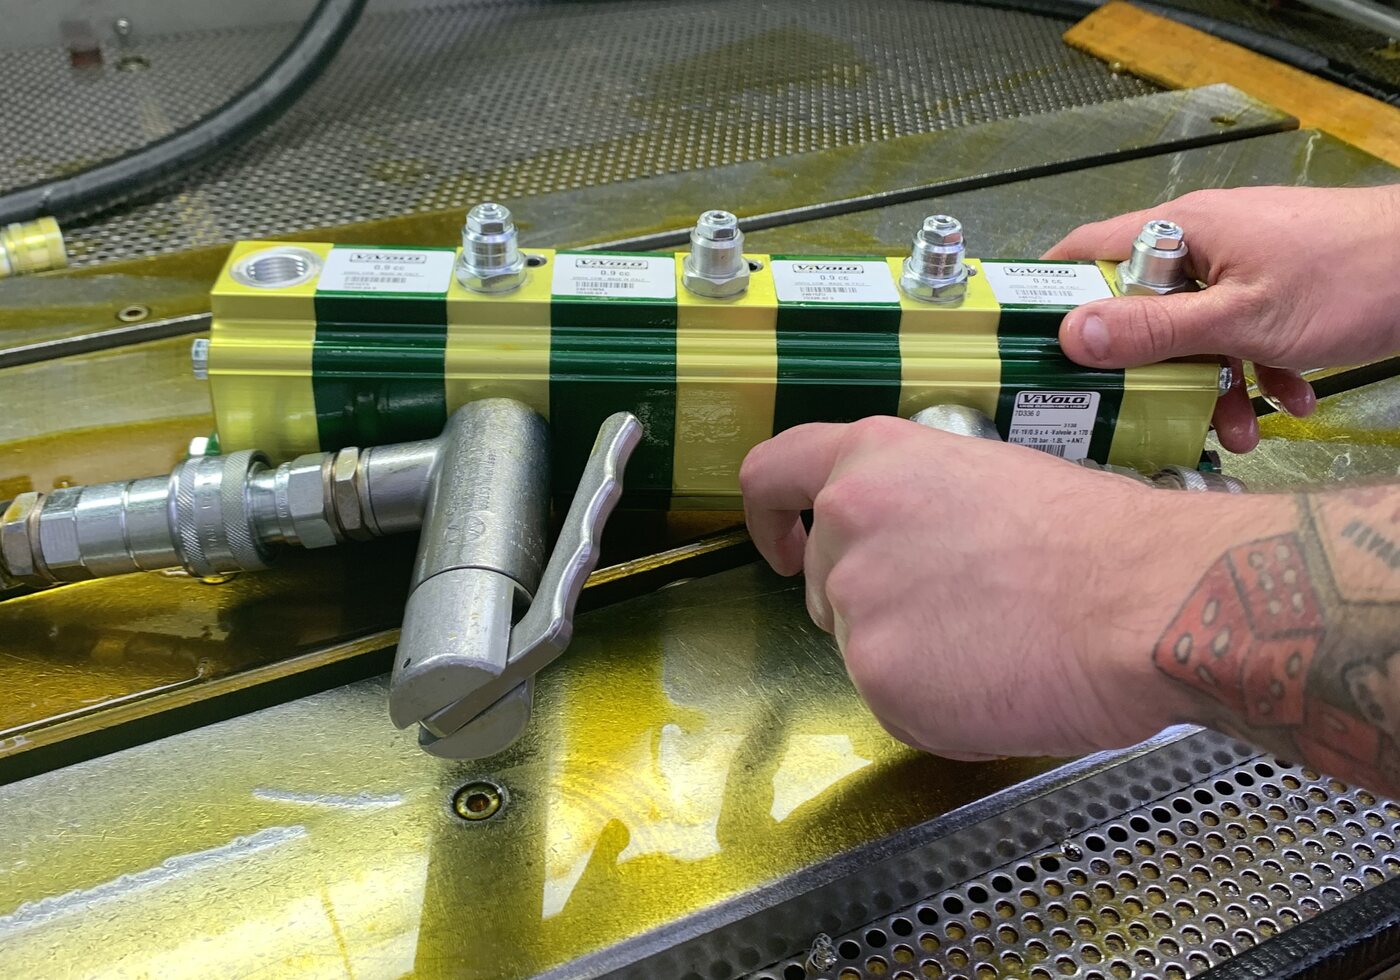
Connect the pipes to the flow divider
Now, you can proceed with the connections. To perform these operations, we recommend that you place the component on a clean table, ideally an unpainted metal shelf.
Cap removal
Remove the plastic caps, being careful not to break them, lest any fragments enter the divider and impair its operation.
Screwing
Hand-tighten the pipe fittings and then complete the screwing by tightening them with a suitable wrench, without using extensions.
CAUTION – Do not use tapered fittings that deform and damage the divider.
Now the divider is connected to the system and you can proceed with the startup .
Startup of the divider
The first thing to do is to purge the air from the system, especially from the piping leading from the divider to the uses.
For the divider to achieve its intended performance, it must first work for about an hour. During this initial phase, check the fittings for leaks. If you notice any leaks, it means that the fittings are not tightened sufficiently and therefore need to be tightened a little more.
If the flow divider is with valves, the procedure remains the same, but with one more step: the phase-correction valves must be calibrated.
Calibration of phase-correction valves
Phase-correction valves intervene at the end of the stroke to eliminate any errors and must be carefully adjusted to open at the appropriate time. Incorrect adjustment could cause a number of problems, including rupture of the flow divider. To do this correctly, it is first necessary to properly connect the drainage pipe.
External and internal drainage
In flow dividers with phase-correction valves, whenever the valve in an element is opened, the flow in that element goes to drain. This flow is then directed to the outside, through a drain port, to which a pipe must be connected, which sends the flow into drainage inside the tank. In this way, external drainage is achieved.
In single-valve series (RV-S) components, by removing the grub screw located inside the drain port and fitting a BSP plug in the same port, the flow is sent to the inlet of the divider, thus achieving internal drainage.
We generally recommend external drainage. In fact, internal drainage is possible, but it puts more stress on the divider than external drainage and makes valve calibration more complex.
For proper operation in the case of RV-V dividers, it is necessary for the drainage pipe to be connected to the tank under the head to ensure that the pipe is always full of oil.
Now you can proceed with valve adjustment, which changes depending on the type of divider to be installed: single-valve or multivalve.
Calibration of valves in the RV-V multivalve divider
To adjust the phase-correction valves of a multivalve flow divider, separate calibration of each element must be performed. We have prepared a simple guide to help you: read how to adjust multivalve flow divider valves.
Calibration of the valve in the single valve divider RV-S
Single-valve dividers are easier to adjust than those with multiple valves because you only need to act on the one valve to adjust all elements at the same time. Find the steps to follow in our guide on how to adjust the single valve in RV flow dividers.
Adjustment of the relief valve in the MIA-FD flow divider
The MIA-FD flow divider does not normally require rephasing to reset end-of-run error. However, when oil movement is frequent and cumulative error may occur, installing relief valves can be beneficial. Read how to install and adjust relief valves on the MIA-FD flow divider.
Control of actuators
Once you have performed the startup and valve calibration, you can check the operation of the divider, verifying that the actuators are moving as intended in the system design.
Do you need help?
Our sales department is here to help you. Contact us, we will be happy to assist you!