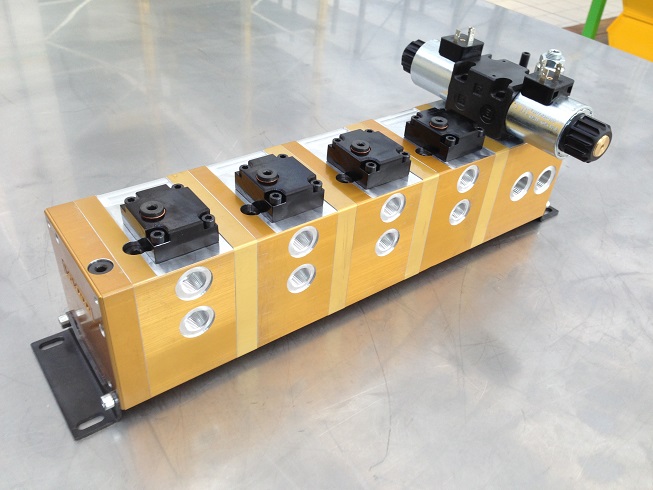
The MIA-FD flow divider — acronym for Manifold Instantaneous Auto-Compensating Flow Divider — is one of the most appreciated hydraulic components in the Vivoil range. With an accuracy of 1.5–2%, it continuously balances loads and maintains optimal flow division even under severe load imbalances. It therefore does not require prior correction.
This performance is achieved through an internal gear system combined with instantaneous valve compensation, which operates continuously up to the end of the run, counteracting the natural tendency of hydraulic oil to flow toward the path of least resistance (lower pressure).
For these reasons, the MIA-FD is not normally equipped with relief valves, i.e., valves used to reset synchronization error at the end of the run. However, in specific cases, rephasing may also be useful on this type of flow divider.
Let’s see when and how to install them.
When to install relief valves on the MIA-FD divider
The MIA-FD is designed to operate without rephasing, as its self-compensating system maintains correct oil flow division even when actuator loads differ significantly. However, when operating cycles are frequent and cumulative error may become significant, installing a relief valve can help reset the error at the end of the run.
Installation is simple: use the CETOP connection, already present on all MIA-FD divider elements. This standard interface is specifically designed to allow the installation of additional components, including relief valves.
How to install and adjust a relief valve on the MIA-FD
Before starting, it is essential to know the maximum operating pressure of the divider elements. This value is necessary for correct valve adjustment.
Once the working pressure has been verified, proceed with installation and adjustment as follows:
- Remove the upper covers.
- Install the relief valves as shown in the example diagram:
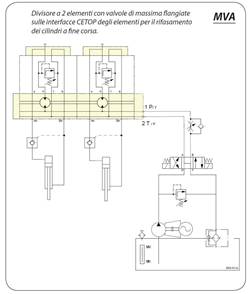
Assembly diagram of relief valves on a 2-element divider - Reinstall the upper covers.
- Disconnect the lines connected to port A.
- Plug port A1 and leave A2 connected to tank (drain).
- Install a pressure gauge on the cover of element 1.
- Loosen the adjustment screw of the valve on element 1.
- Start the divider and adjust the valve of element 1 by setting a pressure:
- 20–30 bar higher than the maximum operating pressure,
- In any case, lower than the setting pressure of the system main relief valve.
- Remove the plug from A1 and install it on A2 (leaving A1 connected to tank).
- Install the pressure gauge on the cover of element 2 and reinstall the plug on element 1.
- Loosen the adjustment screw of the valve on element 2.
- Start the divider and adjust the valve of element 2 following the same procedure as in step 8.
- Remove the plug from A2 and reconnect the lines.
- Start the system and verify cylinder rephasing at the end of the run (bleed air if necessary).
Pay attention to the valve calibration and any air still present in the divider.
Relief valve adjustment is a delicate operation:
- If the setting is too low, unwanted rephasing may occur during the working cycle.
- If the setting is too high, rephasing at the end of the run may be delayed.
The valve must intervene only when the actuators reach the mechanical stop, without affecting normal flow division. We recommend verifying that this condition is met.
After installation and adjustment, ensure that all residual air has been completely removed from the divider. Air inside the unit can alter oil behavior, compromise rephasing accuracy, and cause unstable actuator movement.
Do you need assistance evaluating the most suitable configuration for your application or installing valves on your MIA-FD?
Contact us, we are here to help.